ActivityProfessional.Com Login


renewal cycles. Complete
some now & some later.
and Get 25% off
the Total price!
Buy 3 Courses
and Get 30% off
the Total price!
Buy 4 Courses
and Get 35% off
the Total price!
| Create Account | Login | |


Section 19
Bead Stringing
Table of Contents | NCCAP/NCTRC CE Booklet
Bead Stringing
(The last track of the DVD contains slide(s) illustrating implementation of this activity.)

Like all the other activities in this Manual, Bead Stringing is exactly what it sounds like. The resident is to string beads. For this activity, you need a resident with fairly good eyesight, and the ability to grasp with the thumb and index fingers of both hands. From a craft store or the internet, you can buy large wooden beads in a variety of sizes and shapes with a hole drilled through the center of each bead. I like to use the beads that are about 1” square for this Bead Stringing activity. Clearly, plastic beads with a hole in the middle work just as well, but usually the wooden ones are larger and easier for the residents’ stiff fingers to handle.
The materials are: wooden beads, a length of yarn about a yard long, and a plastic yarn needle or Scotch tape.
Needle Problems: As you know, needles are especially tricky for residents to use, because if your resident pulls the needle too far, the yarn will slip out of the eye of the needle. However, you do need a needle to enable the yarn to slide through the hole in the bead, which is about 1" thick. To solve this needle problem, I wrapped and crimped Scotch tape around the end of the yarn. Someone in a workshop once suggested shoe laces. I have not tried shoelaces myself. My thoughts are, the hard end of a shoelace may be too short to poke through the 1" bead. Thus, you may have to use tape anyway to extend the hard end of the shoelace. Not to mention the obvious fact that shoelaces cost more than a one-yard length of yarn.
To get started, you need to put the first bead on yourself and simply tie it to the end of the yarn to prevent the others from slipping off. As stated above, you might use scotch tape to make a stiff end for the yarn. Or, if your resident is more alert, use a plastic yarn needle. Your resident then strings the beads onto the yarn.
Once the beads are strung, then I usually unstring them when I am out of the resident's sight. The resident with whom this level of activity is appropriate usually is unaware that he or she is restringing the same beads again the next day. However, be careful that you do not unstring the beads while the resident is watching. They may be aware enough to notice and become unmotivated to do it the next day, having seen all of their hard work undone.
Subtle Levels of Difficulty
Like all of the other activities in this Manual, there are many subtle levels of difficulty and cues you need to look for from your resident regarding the specific step he or she is "hung up on," preventing him or her from succeeding at accomplishing the activity.
1. Some residents are able to poke the yarn through the hole, but need help pulling it through the other side of the bead.
2. Other residents are totally unable to poke the yarn through the hole, but experience a great deal of delight in grasping the end of the yarn and pulling it out the other side of the bead.
3. Your most capable resident, of course, can both poke the yarn through one side and pull it out the other side of the bead.
It is essential that you evaluate which of the above three categories your resident is falling into for each activity session. As mentioned earlier, your resident's capability, of course, can change from session to session, or from moment to moment within the same session.
Staying on top of the change
1. Continually evaluate your Effie’s eye movement as she is doing Bead Stringing.
As you know, eye contact is your key indicator regarding your resident's attention span
and their ability to focus on what you are showing them.
Clearly, if your Effie keeps looking away, and isn't even able to watch the Bead Stringing you are demonstrating, something more active like Clay Flattening, described earlier, may be more appropriate for her during this particular session.
2. Continually evaluate your Effie’s facial expression and/or vocalizations. As you assist her to poke the yarn through the hole or pull it through the other side, do her facial expressions or vocalizations seem to indicate neutrality, pleasure, etc?
Are you challenging or frustrating?
Remember success, rather than frustration, is the goal. Continually evaluating eye movement, facial expression, and vocalizations helps you to know when you are crossing the fine line between challenging the resident just enough so they can experience success, versus frustrating your Effie with a task she is unable to accomplish at this particular time.
With many residents, I found they stayed at a "physical assistance" level with Bead Stringing. By "physical assistance" level I mean, you, a staff member, or a volunteer may need to work on a continuous one-to-one basis with the resident poking the yarn through the hole, and verbally and physically prompting them to pull it through the other side of the bead. Since CNA time is, of course, limited, you may save Bead Stringing for use by a volunteer or family member. Leave a simpler activity described earlier in this Manual, like an Activity Apron or a Pillow Maze in their room for the CNA to provide Effie after she returns from breakfast.
| Goal: To pull the yarn through the hole in a bead with physical assistance… Approach: To gently guide the resident's fingers around the yarn, to help them pull it through the bead and reward with praise… |
Goal: To poke yarn through the hole in a bead with verbal prompting… |
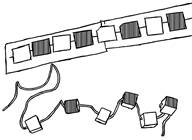
However, if you have a resident that can do Bead Stringing without a problem, a way to make Bead Stringing more difficult is to provide the resident with a Bead Stringing Pattern Card. There is also a photo in the last track of the DVD illustrating a resident using Bead Stringing with a Pattern Card.
To make the Bead Stringing Patterned Card, glue 1” squares of construction paper, or the shape of the bead in colors corresponding to bead colors, to a strip of paper. The resident then strings the beads following the pattern of the colors. However, the problem I found with resident's alert enough to follow a pattern, is that if a resident is alert enough to string the beads and follow the Pattern Card, they are probably aware enough to want to do something more productive, rather than an activity which may seem nonsensical to them. Therefore you might try to devise some type of "productive" use for their Bead Stringing, perhaps decorating the facility, such as red and green beads at Christmas, green beads for St. Patty's Day, red beads for Valentine's Day, pastel beads for Easter, red, white, and blue beads for Fourth of July, orange and black beads for Halloween, brown, orange, and yellow beads for Thanksgiving, etc. You might place these beads around the base of a larger decoration (for example around the base of a small Christmas tree, pumpkin, etc.) on a table.
Residents with whom to try Bead Stringing
| Resident | Who will gather materials and/or construct project? |
Staff /Volunteer to work with resident? When? |
|
|
|
|
|
|
|
|
|
Culture Change Implementation: Place Bead Stringing in labeled Activity Project Bag left in resident’s room for CNA, volunteer, etc. use.
NCCAP/NCTRC CE Booklet
Forward to Section 20
Back to Section 18
Table of Contents
Top